Sign up
If you do not have an account with Hopper, click here to sign up with them first or via email: hotelpartnerships@hopper.com.
Once you have an account with Hopper, please follow these steps to set up your property on Hopper through Hotel Link quickly and smoothly:
Step 3: Create rooms/ rate plans
On the Instructions page, click Map Channel to open the Mapping page.
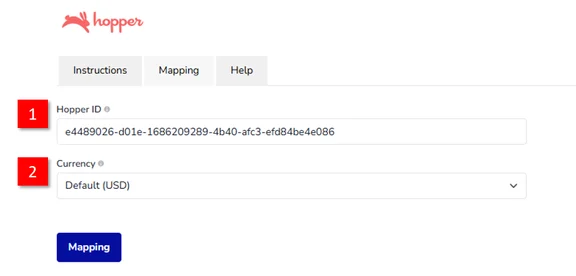
The Mapping page is structured as follows:
- (1) Hotel ID: The system auto-fills your hotel ID. You are not allowed to modify this field.
- (2) Currency: This field displays the default currency used by your hotel. This value can be changed.
Click the Mapping button to show:
- Rooms & Rate plans list
- Channel rate plans table
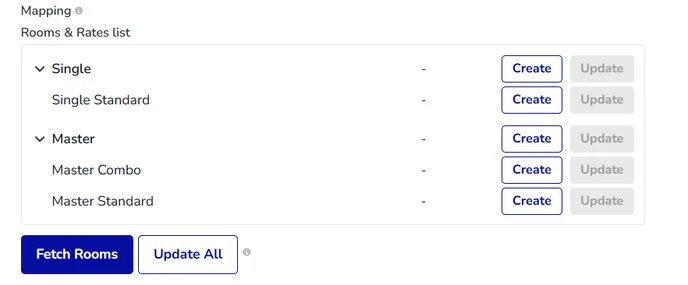
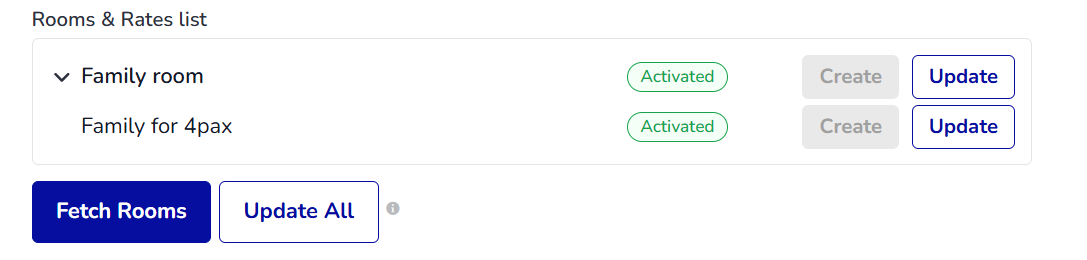
After retrieving the complete list of rooms and rate plans from the Booking Engine , a rooms & rates list will appear:
- The Create button will be enabled, while the Update button will be disabled.
- The status field (3) for rooms and rate plans will be empty by default.
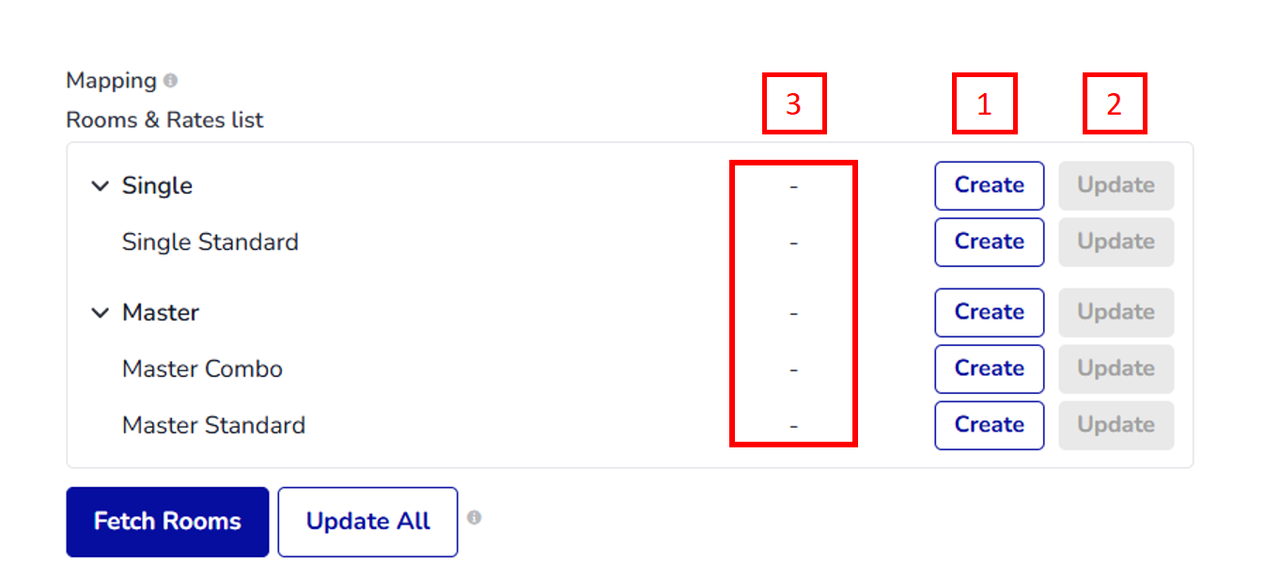
To create rooms and rate plans on Hopper's side, follow these steps:
- Click the Create button to generate rooms/rate plans on Hopper based on your Hotel Link data.
-
If creation is successful:
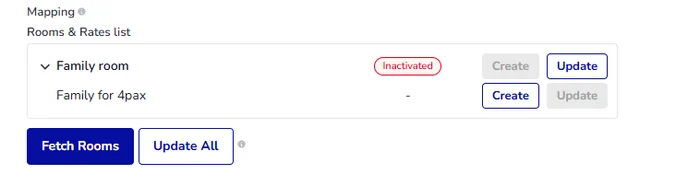
→ The Create button is disabled, the Update button is enabled, and Status shows Inactivated.
-
If creation fails:
→ An error message appears. You can retry by clicking Create again.
- After creation, reload the page to update the status list. Once updated, some rooms/rate plans will change their status from Inactivated to Activated.
Step 4: Fetch rooms
Click Fetch Room button to update the latest status of the room and rate plans from Hopper. If Hopper has activated any of them, their status will change from Inactivated to Activated.
Once fetched, the system will automatically map and update the Channel Rate Plans table.
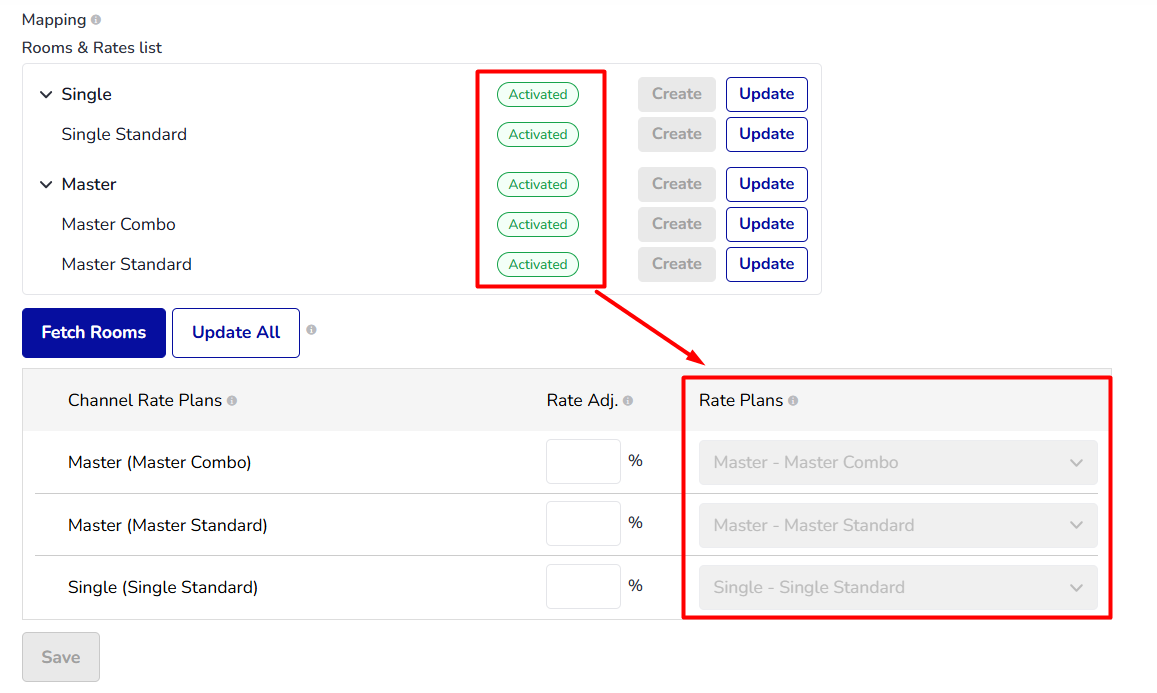
At this stage, you can modify the values in the Rate Adj (Rate Adjustment) column to adjust the rate sent to the channel.
How to remove room/rate plan
Currently, you cannot remove it on Hotel Link's side, as this process is handled on Hopper's end.
To remove room/rate plan, you may send an email to Hopper's support team (hotelpartnerships@hopper.com) the room types and rate plans you would like to remove, and they will assist with this.
Data Connected
Once connected, Hotel Link will update the Hopper calendar with the following details for 365 days:
- Availability
- Rates
- Stop Sell
- Min night
- Max night
- Closed to Arrival
- Closed to Departure
- Release Period
Past Booking Retrieval
After the mapping with Hopper is saved, our system will not retrieve past bookings of this OTA. Hence, hotels need to upload the valid bookings in past days or adjust the availability in Hotel Link extranet to ensure the availability is always accurate.